Gluten Free

Brown Rice Noodle and Veggie Stir Fry with Shrimp (Low-FODMAP, gluten free)

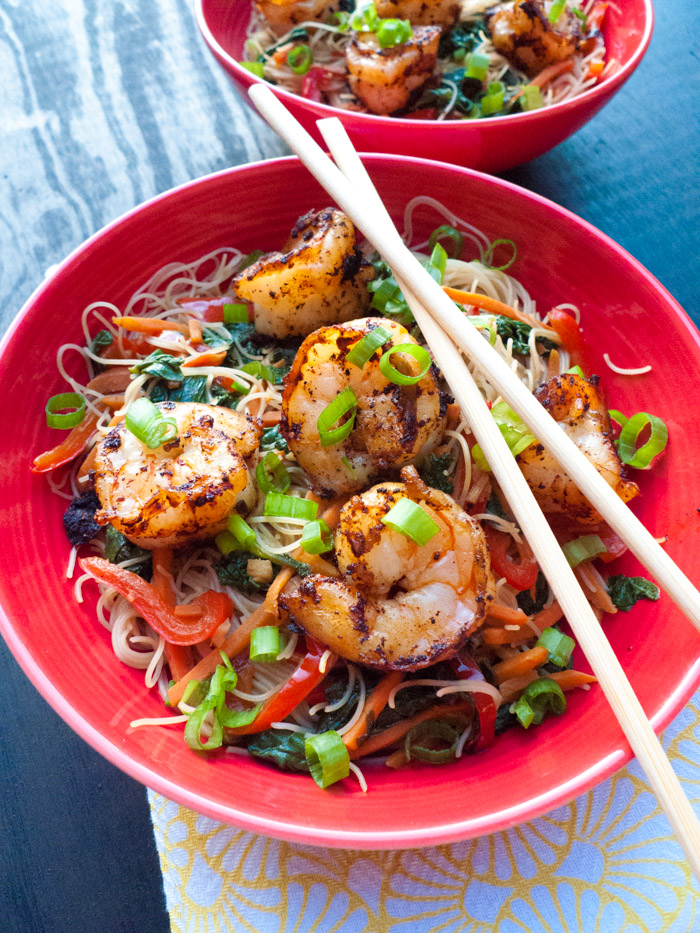
Brown Rice Noodle and Veggie Stir Fry with Shrimp (Low-FODMAP, gluten free, dairy free)

This low-FODMAP, gluten free stir fry is easy and healthy! It's made with brown rice noodles for extra fiber. You can use any veggies and protein you want. It's a quick weeknight meal and tastes great for lunch the next day. Click through for the re…

Save it on Pinterest!

If giving up traditional wheat pasta still bums you out, this recipe will having you loving life again.

Plus, it's fast, addictive and makes for a great leftover lunch.

This is all because of the star ingredient, Asian rice noodles. They're gluten-free of course, they cook in 3 minutes, and they don't take on a weird, gummy texture the next day-- which means you can easily reheat or eat 'em cold straight from the fridge.

Asian rice noodles are versatile (just try them with extra-virgin olive oil, parmesan and lemon zest), but I absolutely love them in this simple stir fry.

How to make this easy rice noodle stir fry!

Here's how it works: You make a quick, tasty sauce and sauté (or steam, or microwave) some veggies. Meanwhile you boil a big pot of water and cook the noodles.

Then you get your protein ready. In this case, I made sautéed shrimp, but you could use baked salmon or chicken, smoked fish, stir fried pork or tempeh, ground turkey or chicken--pretty much anything.

Finally you add it all back to the pot you cooked the noodles in and toss it up. Done. 

All about Asian rice noodles

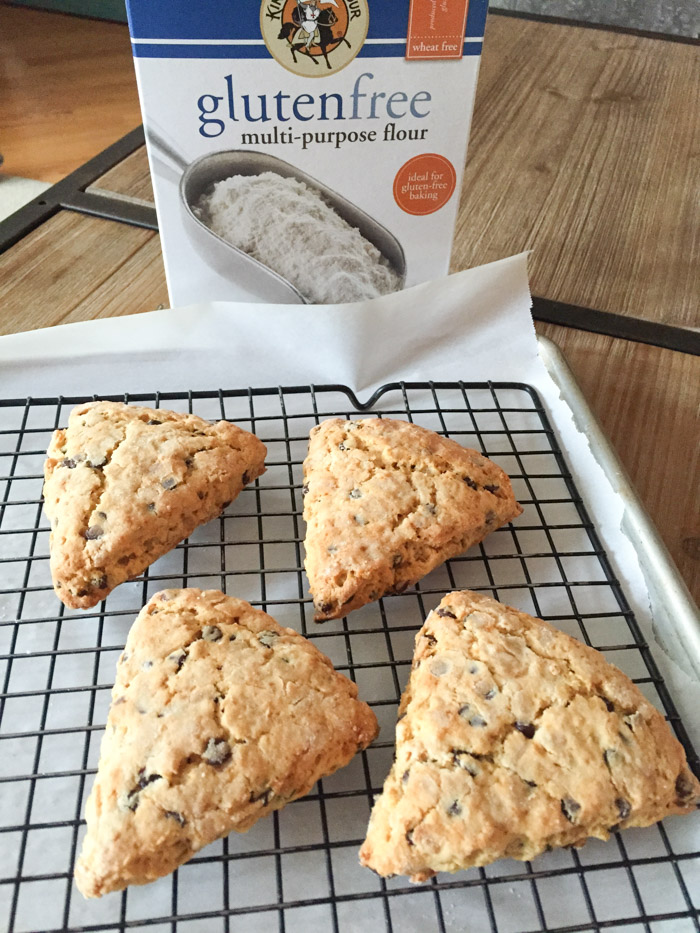
For this recipe, I used brown rice vermicelli from Annie Chun. You can use any brand. If you have access to an Asian market, you can get them fairly cheaply, but they might only have the white rice variety, not brown.

I like using brown rice noodles because they have 4 grams of fiber per serving (read more about how I like to build my meals around fiber-rich foods). But go with what works for you! I find the Annie Chun brand at large supermarkets, Whole Foods and Vitacost.com.

Asian rice noodles can't flat-out replace Italian pasta (my favorite gluten-free brand of Italian pasta is Jovial, by the way), but they definitely make some tasty meals. I love making pad thai with the thicker type of rice noodles. Have you ever had a low-FODMAP version? Let me know if you'd like a pad thai recipe, and I can make that happen!

If you liked this post, enter your info below to get a free 1-week menu of Low-FODMAP, gluten-free suppers delivered straight to your inbox!

This low-FODMAP, gluten free stir fry is easy and healthy! It's made with brown rice noodles for extra fiber. You can use any veggies and protein you want. It's a quick weeknight meal and tastes great for lunch the next day. Click through for the re…

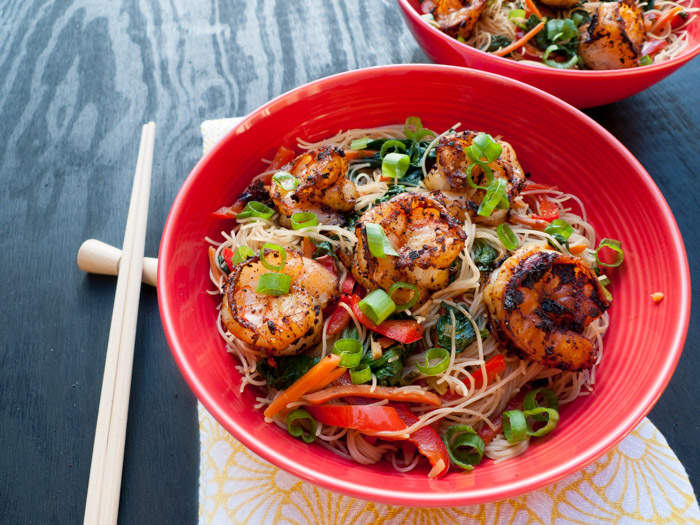
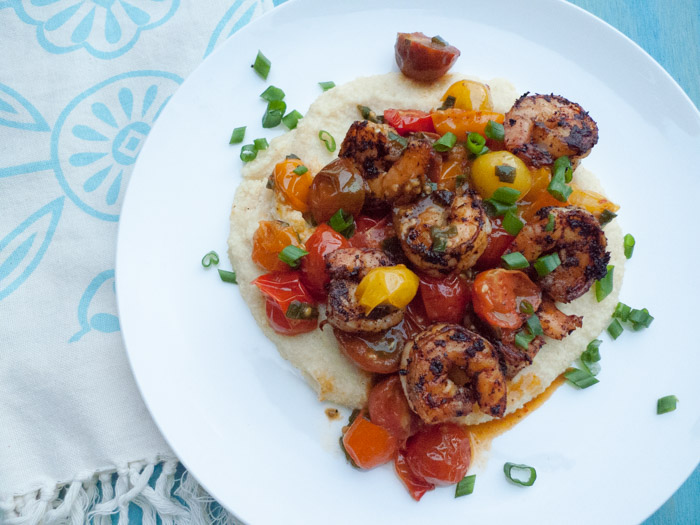
Brown Rice Noodle & Veggie Stir Fry with Shrimp (Low-FODMAP, gluten free, dairy free)

You can use any veggies you want (or any protein--precooked chicken, pork or tempeh makes the cooking even faster). Some good options are zucchini, tomatoes, kale, broccoli, water chestnuts, bokchoy and eggplant. I also like sprinkling sesame seeds on as a garnish, but I forgot to do it for the photo shoot! A little hot sauce is nice too, if you like some heat.

Author: Julie-Calm Belly Kitchen             Recipe type: Entree
Prep time: 5 mins        Cook time: 30 mins        Total time: 35 mins
Serves 4 (makes great leftovers!)

INGREDIENTS

5 tbsp reduced sodium soy sauce (gluten free if needed)
3 tbsp light brown sugar or maple syrup
3 tbsp fresh lime juice (1 to 2 limes)
2 tbsp rice vinegar
2 tsp sesame oil
1 tbsp vegetable oil
1 large red bell pepper, sliced into thin 3-inch strips
2 cups matchstick carrots
1 tbsp chopped fresh ginger (1-inch piece)
Cooking spray (or additional vegetable oil)
5 oz spinach leaves
1 1/4 lb medium shrimp, peeled and deveined (frozen, defrosted work well)
1/4 tsp salt, plus additional to taste
Black pepper to taste
8 oz brown rice vermicelli
6 scallions, green parts only, sliced

INSTRUCTIONS

1. In a medium bowl, whisk together the soy sauce, brown sugar or maple syrup, lime juice, rice vinegar and sesame oil. Set aside. Heat the vegetable oil in a large skillet on medium-high heat. Add bell peppers and cook, stirring frequently for about 4 minutes. Add carrots and continue cooking until vegetables are crisp-tender, about 4 minutes more (add a few tablespoons of water to the skillet if vegetables start to stick). Add ginger and about three-quarters of the scallions and cook for 1 minute, stirring frequently. Transfer to a medium bowl.

2. Return skillet to the stove top, mist with cooking spray (or add more vegetable oil) and heat on medium. Add spinach and cook, stirring frequntly, until wilted, 2 to 3 minutes. Add to bowl with carrot mixture.

3. Return the skillet to the stove top one more time and mist with cooking spray (or add more vegetable oil). Heat on medium-high. Add shrimp, 1/4 tsp salt and black pepper to taste. Cook, turning occasionally, until shrimp are firm to the touch and opaque in the thickest part, 4 to 6 minutes.

4. Meanwhile, bring a large pot of water to a boil. Add rice noodles and cook, stirring frequently, until al dente, about 3 minutes. Drain in a fine mesh strainer and rinse with cold water. Return noodles to the pot you cooked them in. Give the soy sauce mixture a quick whisk and add to the noodles. Heat on medium high and bring to a simmer. Reduce heat to medium and add the vegetable mixture. Gently toss until combined and heated through. Stir in the shrimp. Taste and season with additional salt and pepper if needed. Serve right away and garnish with the remaining scallions.

Nutrition Information
Serving size: 1/4 of recipe Calories: 492 Fat: 9g Saturated fat: 2g Carbohydrates: 68g Sugar:  14g Sodium: 1302mg Fiber: 9g Protein: 38g

Easy Chocolate Chip-Oat Scones (Low-FODMAP, Gluten Free)

Easy Chocolate Chip-Oat Scones (Low-FODMAP, Gluten Free)

These gluten free, low-FODMAP scones have an amazing texture! You won't know they're gluten free. They're easy because you can use a gluten free flour like the King Arthur Multi-Purpose GF flour, which is my favorite. The satisfying scones have toas…

This recipe is for you if you want to make awesome gluten-free scones, but do it in the easiest way possible. And of course, they're also low-FODMAP.

I'm so proud of this recipe because the texture is pretty much identical to scones made with wheat flour. In other words, nobody is gonna know they're gluten free.

They're satisfying and hearty because of the oats, and you can customize 'em any way you like. Interested? Let's do this!

How To Make Easy Gluten Free Scones

What makes these oat-y, chocolatey scones so easy? It's the store-bought GF flour, my friends.

So, a few years ago I got hardcore into gluten-free baking. But I was convinced I had to buy as many individual GF flours and starches as possible and use them to create my own flour blend.

Since store-bought blends often consist of just rice flour and starch, I thought using one would always give me an inferior scone. So what did I do? I blended my little heart out with the 8 different flours I had in my pantry. Which is a lot of work. 

Eventually I came around to trying King Arthur's Multi Purpose Gluten Free Flour. And, what do you know, it made really excellent scones (By the way, this is not sponsored by King Arthur. I just like their flour!). 

To be honest, not everything I've made with it has been a raging success. I recently made a batch of muffins that came out tough and chewy. But I've always loved it for scones. It works so well that I haven't bothered trying any other GF flours. 

If you have a favorite gluten-free flour, please share! Tell me in the comments, and I'll try it next time.

 Use Chocolate or Choose Your Mix-In

For this batch of scones, I used Enjoy Life Semi-Sweet Chocolate Mini Chips. They're great because they're dairy, gluten, wheat, and soy free (and vegan!). Feel free to use any dark chocolate, whether it's chips or your favorite bar chopped up!

Now, if chocolate in the morning doesn't float your boat, these scones would be awesome with walnuts, pecans, citrus zest, dried cranberries or raisins. I've never tried them with fresh fruit, but give it a go if that's what you like to bake with (and let me know how it turns out!). 

Confession: Sometimes I put icing on my scones. You can definitely do that here, and it gives you even more opportunity to get creative with the flavor. Replace the chocolate with orange zest and make an orange glaze--that would be amazing!

 If you've checked out my recipe for Oatmeal-Raisin Scones with Cinnamon Glaze, you might notice that this one is very similar. All I did was sub the King Arthur blend for my mix of GF flours. I love the cinnamon glaze in that recipe, but these scones are amazing with no topping whatsoever.

These gluten free, low-FODMAP scones have an amazing texture! You won't know they're gluten free. They're easy because you can use a gluten free flour like the King Arthur Multi-Purpose GF flour, which is my favorite. The satisfying scones have toas…

Easy Gluten Free Chocolate Chip-Oat Scones (Low-FODMAP, Elimination Phase)

I've only made this recipe using King Arthur's gluten-free flour, but you can use any brand of GF flour. If your flour contains xanthan gum, omit the 1/4 tsp in the recipe. I like using the absolute minimum amount of xanthan gum, so I can't guarantee you'll have the same results if it's included in your flour. 

I use Enjoy Life Semi Sweet Mini Chips, but use any chocolate you like (try chopping up your favorite bar). Keep in mind that small bits mean plenty of chocolate in each bite. These scones would be great with just about any mix-in you can think of: nuts, dried fruit, citrus zest. Take a look at the notes at the end of the recipe for more baking tips.

Author: Julie-Calm Belly Kitchen             Recipe type: Breakfast
Prep time: 25 mins        Cook time: 15 mins        Total time: 40 mins
Serves 6 (can easily be doubled; see notes below)

INGREDIENTS

60 g rolled (“Old Fashioned") oats (1/2 cup plus 2 tbsp)
100 g King Arthur multi-purpose gluten-free flour blend (1/2 cup plus 2 tbsp), plus additional for rolling dough
2 1/2 tbsp granulated sugar
1 1/4 tsp baking powder
1/4 tsp xanthan gum
1/4 tsp salt
1 large or extra large egg (works with whatever size you keep on hand)
2 tbsp lactose-free milk or lactose-free yogurt
2 tsp vanilla extract
57 g cold unsalted butter, cut into small cubes (4 tbsp)
65 g mini dark chocolate chips (see note above) (1/4 cup)


INSTRUCTIONS

1. Preheat oven to 350F. Spread oats on a large rimmed baking sheet (I use a light-colored baking sheet. If you have a dark baking sheet, consider reducing oven temp to 375F or checking a couple minutes early to avoid over-browning the bottoms of the scones) and bake until lightly toasted, stirring once with a spatula, 5 to 6 minutes. Raise oven temp to 400F and measure out a piece of parchment paper that you'll use to line the same baking sheet for the scones. 

2. In a large bowl, whisk together the flour, sugar, baking powder, xanthan gum and salt. In a medium bowl, whisk together the egg, milk or yogurt and vanilla; set aside. 

3. Add the cold butter to the flour mixture. Using a pastry blender (or a fork, or your fingertips), work the butter into the flour until you have a coarse, sandy mixture with chunks the size of small peas. Stir in the oats. Add the egg mixture and raisins and stir just until dry ingredients are moistened.

4. Sprinkle a cutting board or work surface generously with flour and scoop the dough onto the flour. With floured hands, knead dough into a ball. If a good amount of dry crumbs of dough still remain, drizzle with a few drops of additional milk or yogurt to help incorporate them (be super-conservative, as it is very easy to over-hydrate gluten-free dough).

5. Press the dough into a thick disk and use a rolling pin to roll into a circle, about 3/4-inch thick. Dust the dough and rolling pin with flour to prevent sticking. Cut dough into 6 wedges. Line the baking sheet with the parchment paper and transfer the wedges to the baking sheet, leaving a few inches of space between them.

6. Bake in the center of the oven until edges are light golden brown and a toothpick comes out clean, 12 to 14 minutes (rotate the baking sheet after about 8 minutes for even baking). Rest on baking sheet 3 to 5 minutes, then transfer to a wire rack. These are great warm or at room temp and they freeze VERY well. Defrost at room temp for 30 minutes to an hour, and they taste perfect and fresh. 

Notes:

  • You may absolutely double this recipe! Divide the dough into 2 equal pieces, roll into 2 circles and cut each one into 6 wedges. I frequently do a big batch, but sometimes the 6-scone version is all I need. You may want to use 2 baking sheets, rotating them once during baking, if you double the recipe.

  • Rolled oats are sometimes called "Old-Fashioned." Don't use quick, instant or steel cut oats.

  • I use white granulated sugar, but you may sub any type of sugar as long as it is a 1-to-1 substitute.

  • I prefer Lactaid for baking over any other type of lactose-free milk. It works exactly like milk, which is what we want. It is also perfectly fine to use regular milk in this recipe if it doesn't bother your belly, especially since this recipe contains a very small amount.

  • Baking times are for a light-colored metal baking sheet. If you're using a dark-colored one, check the scones a couple minutes earlier, as dark-colored metal promotes quicker browning.

Nutrition Information
Serving size: 1 scone Calories: 257 Fat: 12g Saturated fat: 7g Carbohydrates: 34g Sugar: 11g Sodium: 167mg Fiber: 2g Protein: 4g

Shrimp and Grits Recipe (Low-FODMAP, gluten free, dairy free)

Low-FODMAP Shrimp and Grits Recipe

Shrimp and millet grits are low-FODMAP, gluten free and dairy free. Plus, they're so quick and easy for weeknight cooking! Click through for a free printable recipe and shopping list.

This little recipe kicked off my fascination with southern cooking.

I've been making versions of it for years. It is so simple, I never followed any one specific recipe. I probably saw it for the first time in a food magazine. Having never eaten grits once in my life, I was so ready to jump on that train!

What are grits, anyway?

Grits are corn that has been dried and ground. So, cornmeal essentially! If you think this sounds a lot like polenta, you're right.

Italian polenta and southern grits are made from different types of corn, and the texture of the grind often varies too. Polenta is almost always made from yellow corn and grits are traditionally made from white.

But at the end of the day, they're very similar, and you can switch them up anytime. 

Why use millet?

I've always made shrimp and grits with ground cornmeal or polenta. Then one day, I was shopping online for gluten-free baking supplies and I came across these millet grits from Bob's Red Mill. They're made by grinding the hulled, whole grain millet so they have a more porridge-like texture and are faster to cook (This post is in no way sponsored by Bob, I just like his products!).

I'm always excited to find a "new food," and I know millet is great low-FODMAP grain option. It took about two seconds for me to click "Add to cart!"

You can use any kind of polenta, cornmeal or grits you want, but I definitely recommend the millet grits. Here's why:

  • It's quick! The millet required about 10 minutes of cooking, while stone ground cornmeal takes at least 20.

  • No lumps. I had a MUCH easier time getting lump-free grits than when I use cornmeal or polenta. Tip: Sprinkle in about 1 tbsp at a time and whisk into the simmering liquid before adding more.

  • It's belly friendly. I don't have digestive trouble with cornmeal products but I know many of you do. Millet could be a great alternative!

 If you want to try your hand at southern cooking, this recipe is a great start. It comes together so quickly and easily. When I give the total cooking time, that includes any chopping that needs to happen beforehand, by the way.

Even better, this is a healthy dish that's low in calories (not usually associated with southern food, I know). It's one of my weeknight stand-bys when I want something a little different and special.

Do you make shrimp and grits? Or are you a die-hard polenta fan looking to try something new? Share in the comments!

Shrimp and millet grits are low-FODMAP, gluten free and dairy free. Plus, they're so quick and easy for weeknight cooking! Click through for a free printable recipe and shopping list.

Shrimp and Millet Grits (Low-FODMAP, gluten free, dairy free)

You can substitute regular corn grits or polenta for the millet grits. Cook them according to the instructions on the package. I used heirloom cherry tomatoes in this recipe, but you can use any tomato (It also works with canned tomatoes. Just simmer to reduce the liquid a bit.). Halve them if you're using cherry tomatoes and chop if you're using large ones. If you're sensitive to tomatoes, try using a larger variety since the small ones are sweeter and are likely to contain more sugar. Do what works for your body!
Author: Julie~Calm Belly Kitchen             Recipe type: Entree
Prep time: 8 mins        Cook time: 30 mins        Total time: 38 mins
Serves 4 (can easily be halved)

INGREDIENTS

3 1/2 cups water
1 cup millet grits (see note above)
Salt and black pepper to taste
1 tbsp garlic infused oil
1 lb tomatoes, chopped (see note above)
5 scallions (green parts only), sliced
1 1/4 lb medium shrimp, peeled and deveined
1 tsp ancho chile powder

INSTRUCTIONS

1. Bring the water to a boil in a medium saucepan. Slowly add the millet (about 1 tbsp at a time), whisking as you go. Reduce heat to medium and simmer, whisking occasionally until millet thickens. Reduce heat to low, maintaining a slow simmer, and partially cover the pan with it's lid. Grits have a tendency to pop up and splatter, so be careful! Continue cooking until millet is tender, 10 to 15 minutes. If you want a thinner consistency, add more water. Season with salt and pepper to taste. Remove from heat, cover and set aside.

2. Meanwhile, heat the oil in a large skillet on medium heat. Add tomatoes and cook, stirring occasionally, until the skin slackens and they release their juices, 4 to 6 minutes. Add about 3/4 of the scallions and cook until tender, 1 to 2 minutes. Season to taste with salt and pepper. Transfer to a bowl and set aside. Wipe out the skillet with paper towel (carefully!).

3. Mist the skillet with cooking spray (or use more garlic oil) and heat on medium high. Season the shrimp with ancho chile powder, salt and pepper. Cook, stirring occasionally, until shrimp feel firm to the touch and are opaque in the thickest part, 4 to 6 minutes. 

4. Add tomatoes back to the skillet with the shrimp and reduce heat to medium low. Stir to combine and cook just until heated through. Serve shrimp mixture over the grits and garnish with remaining scallions.


Nutrition Information
Serving size: 1/4 of recipe  Calories: 352  Fat: 7g  Saturated fat: 1g  Carbohydrates: 40g  Sugar: 3g Sodium: 344mg  Fiber: 5g  Protein: 36g

Easy One-Pan Ratatouille (low-FODMAP recipe)

Easy One-Pan Ratatouille Low-FODMAP gluten free

For years I followed the "rules" of healthy eating. For example...

  • Eat whole wheat bread and pasta to get fiber and nutrients

  • Fill half your plate with vegetables

  • Have oatmeal for breakfast to feel fuller longer

  • Have 3 balanced meals and 2 snacks

  • Eat fruit for dessert

  • Get plenty of calcium from dairy products

The list could go on. I was following most of these rules year in and year out wondering why my stomach felt terrible so often.

I was doing everything right, so what the heck was wrong with me?

If you went through the same thing before learning about FODMAPs, you probably see where I'm going with this. The low-FODMAP diet helps people like us manage our digestive symptoms. And it does this by going against conventional healthy eating wisdom more often than not.

Lesson: Sometimes you have to break the rules to get remarkable results.

And that is exactly how I developed this easy, one-pan ratatouille recipe. Traditional ratatouille may be a simple, homey dish (which you know if you've seen the Pixar movie), but here's what that cute little animated rat doesn't tell you: It's actually a time-consuming and "involved" sort of recipe.

Easy One-Pan Ratatouille Low-FODMAP gluten free

The individual ingredients are usually cooked separately (and slowly), often in multiple pots, and in the oven too. Some recipes tell you to salt the eggplant (totally unnecessary!), peel tomatoes and make a fresh sauce, let the finished ratatouille rest... It's a little out of control.

I wanted super-tender, flavorful veggies and a thick sauce.

So I decided to take the low-FODMAP veggies I love, quickly brown them and simmer them up with canned tomatoes. Guess what? It totally worked. And it turned out even better than I expected. Don't you love it when that happens?

Yes, this recipe is all veggies (obviously), so stick to a moderate portion. Maybe 1/2 cup to start? If you know any of these veggies disagree with you, add something else or use extra zucchini if you don't like eggplant, for example.

Think of this ratatouille as a magic little side dish-slash-topping that can take pretty much any meal from boring to awesome. And it's oh-so-good the next day and the day after that. Use it to create different meals throughout the week.

For instance, you could...

  • Pair it with any protein (I added sliced grilled chicken)

  • Serve it over polenta

  • Serve it over roasted pork tenderloin

  • Turn it into a topping for simple grilled or sautéed fish

  • Use it as a sauce for gluten-free pasta

  • Add it to steamed quinoa, millet, sorghum or rice for a really great side dish

  • Mix it into a green salad instead of raw veggies

  • Add it to a sandwich or wrap

  • Make it an omelet filling

Easy One-Pan Ratatouille (Low-FODMAP, gluten free)

Traditional ratatouille is usually a time-consuming, multi-step process, but this one is done in one pan on the stovetop (no hot oven--yay!) in about an hour. And it makes a nice, BIG batch. Serve it over polenta, pasta or a grain like quinoa. Add a protein if you want. Make a salad with it the next day. Lots of possibilities with this one! 
Author: Julie~Calm Belly Kitchen             Recipe type: Sides
Prep time: 5 mins        Cook time: 1 hour        Total time: 1 hour, 5 mins
Serves 8 (1 serving=1/2 cup)

INGREDIENTS

3 to 4 tbsp olive oil
1 med eggplant (1 lb), chopped
salt and black pepper to taste
2 small zucchini (12 oz), chopped
1 large red bell pepper (8 oz), chopped
6 oz thin green beans (haricots verts)
2 1/2 cups unsalted diced tomatoes (from can, jar, etc)
3/4 tsp dried herbs (any combo of thyme, tarragon, rosemary, etc)
Red chile flakes or minced fresh red chile (optional)
1/3 cup chopped olives, such as kalamata
4 oz feta cheese, crumbled
Chopped fresh basil

INSTRUCTIONS

1. In a large, wide sauté pan, heat about 1 1/2 tbsp of oil on medium high. Add eggplant, season with salt and black pepper, and cook, stirring freqently, until lightly browned (eggplant will not be soft and cooked through at this point), 7 to 10 minutes. Transfer to a large bowl. If a lot of brown bits are sticking to the pan, add about 1/4 cup water (or red wine). When it starts to simmer, scrape the bottom of the pan with a spatula to deglaze.

2. Heat about 1 1/2 tbsp of oil in the pan, still on medium high heat, and add the zucchini and bell pepper. Season with salt and black pepper and cook until lightly browned, 7 to 10 minutes. Add to bowl with eggplant. Deglaze pan again if you like. Add 1 to 2 tsp of oil. Add green beans and cook, stirring frequently, until lightly browned, about 3 minutes.

3. Add tomatoes to pan with green beans and bring to a simmer. Stir in eggplant, zucchini, bell peppers, dried herbs and chile flakes if using. Cover and simmer on medium to medium-low heat until vegetables are very tender and sauce has thickened, 25 to 30 minutes, stirring occasionally. If pan gets too dry before veggies are done add water as needed. Stir in olives. Season to taste with salt and black pepper.

4. Serve ratatouille over polenta, gluten-free pasta or quinoa (or use any of the other ideas in this blog post). Sprinkle with feta and fresh basil. I like to add chicken for protein.

Nutrition Information
Serving size: 1/8 of recipe  Calories: 139 Fat: 9g Saturated fat: 3g Carbohydrates: 12g Sugar:  6g Sodium: 296mg Fiber: 4g Protein: 4g

Classic Vinaigrette & Strawberry-Spinach-Feta Salad (low-FODMAP recipes)

Classic Vinaigrette & Strawberry-Spinach-Feta Salad (low-FODMAP recipes)

Strawberry-Spinach-Feta Salad with Classic Vinaigrette Low-FODMAP

I'm a big fan of "go-to" recipes. If you've been part of the email crew for a while, you might remember me talking about this in a past newsletter.

To sum it up, you've got to have easy, no-brainer recipes you can make even if you're totally exhausted and didn't do any planning beforehand.

For a lot of women I talk to, starting the low-FODMAP diet (or ANY specialized healthy eating plan) means you're suddenly cooking every bite of food that goes in your mouth.

So not only do you have the challenge of a restrictive diet, but you have to learn a whole new skill set to go along with it. And watching a few episodes of Giada (or Guy Fieri, if that's your jam), isn't going to cut it.

Here's my advice: Don't start bookmarking complicated recipes online and trying to make a new and exciting dish every night of the week. Instead, start with the basics. 

ENTER, CLASSIC VINAIGRETTE...

Everyone needs a simple salad dressing they can make in 2 seconds (fine, it really takes 2 minutes). Because, and here's where the magic happens, it's not just for salad. Here's what you can do with my classic vinaigrette recipe:

  • Use as a marinade for chicken, beef or pork.

  • Use as a sauce for any kind of seafood (shrimp, salmon, scallops, white fish).

  • Toss with cold leftover quinoa, sorghum or gluten free pasta.

  • Drizzle over grilled, steamed or roasted vegetables (eggplant, potatoes, zucchini, bell peppers, green beans, broccoli).

  • Use it on a salad, but get creative with your greens. Try arugula, butter lettuce, baby kale, radicchio, endive or frisée.

To make a really tasty (and super versatile!) dressing you only need 4 ingredients. Plus salt. But here's the real kicker: The measurements don't need to be exact. Once you do this a few times, you don't need to bother with measuring spoons unless you want to.

Strawberry-Spinach-Feta Salad with Classic Vinaigrette Low-FODMAP

The measurements I'm giving you are great place to start.

Can you make substitutions (lemon juice instead of vinegar, for example)? Can you add stuff (herbs, spices)? Yes and yes. You cannot mess this up. If you don't think your creation tastes quite right, tweak away until it does. I personally like a higher proportion of acidic ingredients than most traditional vinaigrettes contain, so that's how I make it!

Classic Vinaigrette with Strawberry, Spinach & Feta Salad

This recipe makes 2 good-sized entrée salads. You can make half the recipe for a single meal, but why not make the whole thing and save half for lunch the following day? Put a serving of vinaigrette in a little jar so you can take it with you on the go and dress your salad when you're ready to eat--no soggy greens! I like adding chicken to this salad (I broil a big batch of chicken breasts every few days and use them for everything), but any protein works here. A great meatless option would be quinoa or sorghum. Note that the vinaigrette recipe makes enough for 4 servings. It keeps in the refrigerator for several days.
 

Author: Julie~Calm Belly Kitchen             Recipe type: Entrée
Prep time:  15 mins        Cook time:  0 mins        Total time:  15 mins
Serves 2

INGREDIENTS

For Classic Vinaigrette:
6 tbsp extra virgin olive oil
4 tbsp red wine vinegar
2 tsp Dijon mustard
1 tsp sugar or maple syrup
Pinch sea salt

For Salad:
5 oz spinach leaves (about 5 packed cups)
12 medium strawberries
12 to 16 kalamata olives, pitted and chopped
4 tsp sunflower seeds
Freshly ground black pepper to taste
1/2 recipe (approximately) Classic Vinaigrette
6 to 8 oz broiled, roasted or grilled chicken breasts, sliced
2 oz feta, crumbled (about 1/2 packed cup)

INSTRUCTIONS

1. Add all the vinaigrette ingredients to a jar with a tight-fitting lid. Shake it up until combined (or emulsified if we're fancy). Taste and adjust as you like.

2. Add spinach, strawberries, olives, sunflower seeds and black pepper to a large bowl. Add 4 to 5 tbsp of the vinaigrette (a little less than half of the recipe). Toss well and add more vinaigrette if needed. Remaining vinaigrette will keep in the refrigerator for several days.

3. Divide salad between two bowls and top with sliced chicken. Sprinkle with feta and enjoy.

Nutrition Information (with 12 olives and 6 oz chicken)
Serving size: 1/2 of recipe  Calories: 484 Fat: 35g Saturated fat: 8g Carbohydrates: 13g Sugar: 6g Sodium: 848mg Fiber: 4g Protein: 35g

NOTES

-I use Dijon mustard in my vinaigrette not just for flavor, but because it's an emulsifier. Which means, it keeps the oil and vinegar from separating for longer, even after you've put it your salad. (Here's more info for the food science nerds. Of which I am one.)

-I also use a little somethin' sweet in my vinaigrette. Sugar (I usually just use the plain old white stuff) creates a more complex, balanced flavor. You can use any type of sweet stuff you like. Maple syrup is great, and it's an emulsifier too!

One-Pot Cheesy Quinoa with Prosciutto, Ground Turkey and Basil (Low-FODMAP, gluten free)

One-Pot Cheesy Quinoa with Prosciutto, Ground Turkey and Basil (Low-FODMAP, gluten free)

I love that this requires just one pot! It's a great, simple weeknight meal that happens to taste like pizza, but much healthier. 

Lemon Bars with Almond Shortbread Crust (Gluten free, low-FODMAP)

Lemon Bars with Almond Shortbread Crust (Gluten free, low-FODMAP)

Lemon Bars with Almond Crust Low-FODMAP, gluten free, dairy free

You know those desserts that are just pure nostalgia? Yours might be Tollhouse chocolate chip cookies, rice krispy treats, pumpkin pie. For me, it's lemon bars. 

When I started getting hired as a recipe developer, one of the first recipes I created for Shape magazine was a twist on lemon bars (Citrus Squares with less fat and sugar--but still super-yummy!).

Eventually, I created an ultra-lemony version for my old food blog that I called, "Lemon Lovers' Lemon Bars." Cute, huh? I try to make them at least once a year. A firm favorite for sure.

Crusty Conundrum

If you've never tried this classic, summery dessert, here's the deal: Lemon bars are the easy, short-cut version of a lemon tart, and that tart crust most definitely isn't low-FODMAP.

So, here's what I did to make the crust for my lemon bars low in FODMAPs, gluten free and possibly even better than the traditional version. I used almond meal to make a base that is crisp-tender and more flavorful than a dough made with white, all-purpose flour. 

Magic (aka sweet rice flour) to the rescue

The almond meal is the main ingredient, but the real magic comes from sweet rice flour. This the stuff that's made from short-grain sticky rice--the kind in your sushi. It is also known as glutinous rice flour (even though it is gluten free!), and sometimes goes by the name "mochiko."

Sweet rice flour keeps baked goods really tender, but it's also a great binder (think sticky rice)! This is amazing because it helps hold gluten free flours together without making the texture too chewy (you know, so chewy that your jaw is tired by the time you're done eating?).

The lemon filling is usually thickened with all-purpose flour, but the sweet rice flour does the job in my recipe.

When I used to make my old recipe, I'd always worry so much about over baking that filling; the edges get tough if you cook it too long. But guess what? That doesn't happen with sweet rice flour. The edges of the bars are just as soft and luscious as the center.

For me, this is huge.

Holler back!

Have you had lemon bars before? How long has it been? And do you do much baking with sweet rice flour? Share your recipes and tips in the comments. I read every one!

Lemon Bars with Almond Crust Low-FODMAP, gluten free, dairy free

Lemon Bars with Almond Shortbread Crust (Low-FODMAP, Gluten-Free)

With a tender almond meal crust and VERY lemony filling, these are bars make for an irresistible casual dessert.
Author: Julie~Calm Belly Kitchen             Recipe type: Dessert
Prep time: 20 mins        Cook time: 40 mins        Total time: 1 hour (plus cooling)
Serves 12

INGREDIENTS

For crust:
Butter for the pan
105 g almond meal (3/4 cup plus 3 tbsp)
50 g sweet rice flour (1/4 cup plus 1 tbsp)
38 g powdered sugar (1/4 cup plus 1 tbsp)
½ tsp salt
6 tbsp unsalted butter, melted (84 g)

For filling:
150 g granulated sugar (3/4 cup)
28 g sweet rice flour (2 tbsp plus 2 tsp sweet rice flour)
1/4 teaspoon salt
2 extra large eggs, lightly beaten
1 tbsp plus 2 tsp lemon zest (from about 2 lemons)
1/2 cup lemon juice (from about 3 to 4 lemons) 

INSTRUCTIONS

Preheat oven to 325F. Line an 8 x 8-inch (2 quart) metal baking pan with nonstick foil, leaving some hanging over the sides so you can lift the finished bars out of the pan. Lightly butter the foil (you can also use parchment paper, or just butter the pan really well!). 

Make the crust: In a large bowl, whisk together the almond meal, sweet rice flour, powdered sugar and salt. Add melted butter and stir until combined. Transfer to prepared baking pan and press into an even layer. Bake until the edges are just barely golden (center will still be pale), 20 to 24 minutes.

Meanwhile, make the filling: Wipe out the bowl you used to mix up the crust ingredients. Add the sugar, sweet rice flour and salt and whisk until combined. In a medium bowl, whisk together the eggs, lemon zest and lemon juice. Add to the bowl with the sugar mixture and stir until combined. Pour over the hot crust. Return to oven and bake until the filling is just set in the center, 17 to 19 minutes. Cool completely on a wire rack. Cut into 12 bars. Store at room temperature in an airtight container up to 1 day or in the refrigerator up to 5 days.

NOTE: Baking time is for a light-colored metal pan. Dark-colored pans may require a shorter baking time.

Nutrition Information
Serving size: 1/12 of recipe  Calories: 197 Fat: 11g Saturated fat: 4g Carbohydrates: 23g Sugar:  16g Sodium: 202mg Fiber: 1g Protein: 3g