Entree

Lemon-Caper Fish and Veggies Grilled in Foil Packets (Low-FODMAP Recipe)

Lemon-Caper Fish and Veggies Grilled in Foil Packets (Low-FODMAP Recipe)

This simple foil packet method is the easiest way to cook delicate fish and veggies on the grill. This low FODMAP recipe is healthy, fast and a great choice when you're eating for IBS.

Pin It!

Need a simple, healthy grilling recipe that happens to be low-FODMAP? If you've ever tried to cook delicate white fish on the grill, there's a good chance you've ended up with a hot mess. I definitely have!

This simple foil packet method not only solves that problem, but it also gives you super-moist fish and flavorful veggies. It's a full meal in a packet!

The lemon and caper topping creates a delicious broth that doubles as a sauce...next time I'll likely transfer the entire contents of the packets into shallow bowls so I can catch every drop.

For the veggies I chose zucchini and red bell pepper, but you can change it up! Other great options are shredded carrots, kale, Swiss chard or green beans. You could also swap the lemon-caper topping for your favorite herbs and spices. It's the cooking method that's the star in this dish.

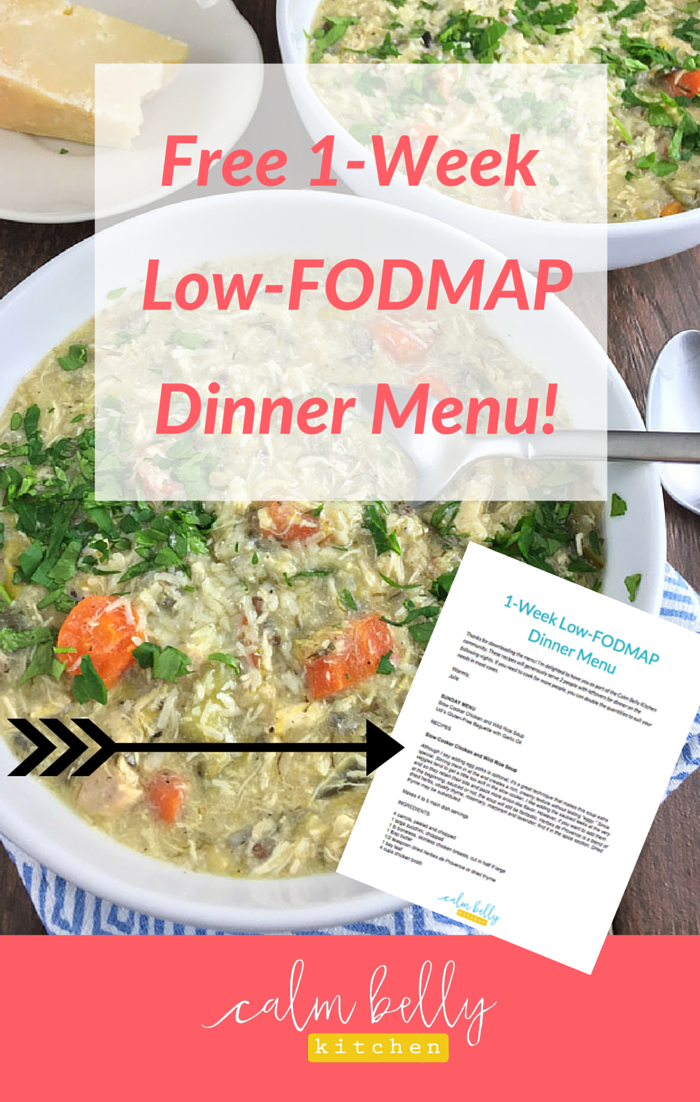
>>> Need to make food shopping on the FODMAP Diet a little easier? I created a free shopping list of everyday food you can find at most supermarkets (plus links to some of my favorite low-FODMAP recipes!). Click to grab it!


Looking for more low-FODMAP grilling recipes? Check out Caprese Salad with Grilled Eggplant or the Grilled Steak with Chimichurri Sauce!

Lemon-Caper Fish and Veggies Grilled in Foil Packs

Serves 2 (double recipe if needed)

This recipe works with especially well with delicate fish fillets that can be difficult to cook directly on the grill rack. I used whitefish fillets, but cod, tilapia, trout, or snapper would all work well - skin on or off.

INGREDIENTS

Cooking spray
1 medium zucchini, sliced thin
½ red bell pepper, sliced thin
Salt and freshly ground black pepper to taste
2 6-ounce fish fillets (see note above)
1 tsp olive oil
1 tbsp capers, chopped
1 lemon, sliced thin and seeds removed
Chopped parsley, basil, tarragon or cilantro for serving

INSTRUCTIONS

1. Prepare a charcoal or gas grill (medium-high for gas). Tear off two pieces of foil, 20-22 inches long each. If fish fillets are long and narrow, cut in half crosswise.

2. Place half the zucchini and bell pepper in the center of each piece of foil. Season with salt and pepper. Place fish on top of veggies. If you cut fillets into two pieces, place side by side. Drizzle with olive oil and season with salt and pepper. Top with capers and lemon slices.

3. Fold long sides of foil together and fold over to seal. Fold over each short end several times to seal tightly.

4. Place foil packets on grill and cook until fish is opaque in thickest part, 9 to 13 minutes. Thin, skinless fish will cook faster than thicker pieces or pieces with skin. Since the steam inside the packets is mainly responsible for cooking the fish, it’s difficult to dry out your fish with this method. The whitefish I used took 11 minutes. Place packets on plates or in shallow bowls and rest unopened for 5-10 minutes. Open carefully (steam will be hot), sprinkle with fresh herbs, and serve.
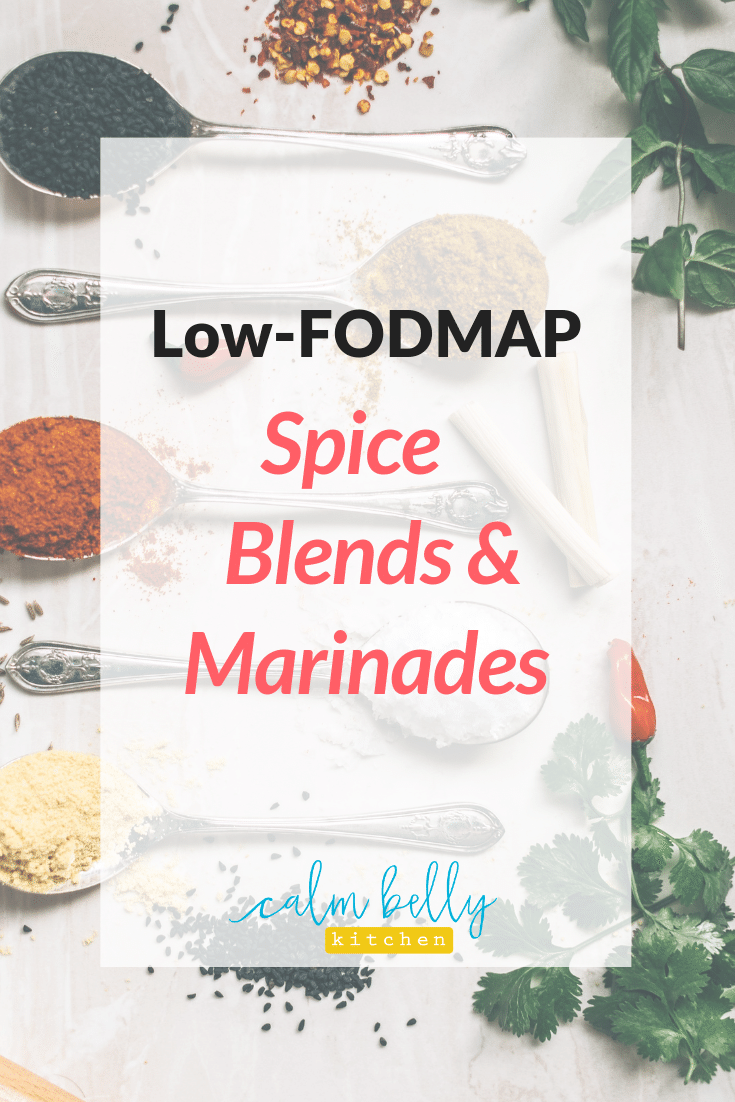
 

Fresh Strawberry Pancakes (Low-FODMAP, Gluten Free)

Fresh Strawberry Pancakes (Low-FODMAP, Gluten Free)

Made with almond meal, oat flour and cornmeal, these strawberry pancakes are satisfying and high protein but still light and tender. They're gluten free and low FODMAP and perfect for a Valentine's Day breakfast. Serve these healthy pancakes with wa…

Save it on Pinterest!

These fresh strawberry pancakes are light, nutritious and pretty. They’ll be great in the summertime, but maybe even more perfect as a fun Valentine’s Day breakfast.

I used gluten-free whole grain ingredients - mainly almond flour - so they’re tender and moist AND high in protein. The strawberry slices caramelize slightly in the skillet, making them even sweeter. 

The topping is super easy: warmed strawberry preserves. I’m also happy to report that these pancakes are just as good with maple syrup (my personal choice!). Or go wild and mix the two.

Do you have any favorite Valentine’s Day breakfast recipes? How about desserts? Leave a comment and let me know!

Want more low-FODMAP breakfast recipes from the blog?

Made with almond meal, oat flour and cornmeal, these strawberry pancakes are satisfying and high protein but still light and tender. They're gluten free and low FODMAP and perfect for a Valentine's Day breakfast. Serve these healthy pancakes with wa…

Fresh Strawberry Pancakes (low-FODMAP, gluten free)

The warmed jam is a fun alternative pancake topping, but I’m a diehard maple syrup lover. Use whatever you prefer, or mix them. I haven’t tried substituting any other GF flours, but if you know your gluten-free ingredients, give it a shot and let me know how it goes!

Use certified GF ingredients if needed (you don’t need to avoid gluten on the FODMAP Diet) and choose preserves with no high-fructose corn syrup so they’re low-FODMAP.

Makes 8 to 9 5-inch pancakes (1 serving = 2 to 3 pancakes)

INGREDIENTS

2 tsp lemon juice or white vinegar
½ cup plus 2 tbsp lactose free milk
¾ cup almond meal (72 grams)
1/4 cup oat flour (30 grams)
¼ cup cornmeal (34 grams)
2 tbsp sugar
1 tsp baking powder
¼ tsp salt
2 large eggs
1 tsp vanilla extract
¼ tsp almond extract (optional)
3 to 4 drops red food coloring (optional)
Cooking spray
1 cup cored and sliced strawberries plus additional for garnish
Topping options: warmed strawberry preserves or maple syrup

INSTRUCTIONS

1. In a liquid measuring cup or medium bowl, combine lemon juice and milk; set aside. In a large bowl, whisk together the almond meal, oat flour, cornmeal, sugar, baking powder and salt.

2. In medium bowl, whisk the eggs. Add vanilla, almond if using, and milk mixture; whisk until combined. Add to bowl with dry ingredients and stir until just moistened. Stir in food coloring if using. Rest 3 to 5 minutes to allow dry ingredients to hydrate.

3. Heat a nonstick skillet or griddle to just above medium heat. Place 4 to 5 strawberry slices close together in the skillet. Pour about ¼ cup batter over strawberries. Cook until small bubbles appear and bottom side is golden brown, 1 to 2 minutes. Flip and cook until opposite side is golden, about 1 minute.

4. Repeat with remaining strawberries and batter, adjusting heat as needed so pancakes don’t brown too quickly. You can serve as you go, or transfer pancakes to a baking sheet and keep warm in a 175F oven. To serve with warm jam, heat jam in a microwave-safe bowl until it drips off a spoon, 60 to 90 seconds. Garnish with additional strawberries if desired.

Low-FODMAP Pad Thai and Cantaloupe-Shrimp Salad

Low-FODMAP Pad Thai and               Cantaloupe-Shrimp Salad

This Thai menu is healthy AND low FODMAP! Your main dish is tasty Pad Thai Noodles with chicken and shrimp, plus Cantaloupe-Cucumber Salad with Shrimp (and a tangy Asian dressing) on the side. This menu proves you can relieve IBS without deprivation!

Share the love...Pin It!

Pad thai is not only easy to make low-FODMAP, but it's easier to make at home than you might think.

Once you get the hang of it, you'll prefer your homemade version over takeout - no more greasy noodles mixed with a few skimpy shrimp. My recipe has plenty of healthy protein and the sauce adds tons of sweet-tart flavor.

Psst! Just getting started with FODMAP? Click here to join the FREE 7-Day Cleanse & learn to feel better fast!

Pad Thai noodles are a classic, but the cantaloupe salad is my own invention. It's cool, refreshing, and a nice change from lettuce.

You can serve both dishes together as a full menu, but sometimes I just make the Pad Thai. The recipe has a lot of components (sauce, noodles, protein, eggs, garnishes...whew!), but once you start cooking it comes together FAST. Have all those ingredients ready to go!

Have you ever made Pad Thai? What other Thai dishes would you like to make low-FODMAP? Leave a comment and let me know!

You might also like The Ultimate FODMAP Guide to Flavor without Onion and Garlic

If you like these recipes, check out the Calm Belly Kitchen Cookbook

Low-FODMAP Pad Thai

I use a very large (13-inch) straight-sided saute pan for this dish (this one specifically). If you don't have a saute pan or wok large enough to fit all the ingredients, add the chicken and shrimp mixture to the large pot you cooked the noodles in and proceed with the recipe from there. There are substitutions for tamarind concentrate, but none of them will give you the uniquely tart, fruity flavor. You can buy it in ethnic food stores or online here and here.

Makes 4 large low-FODMAP servings (about 2 cups each), or 6 smaller servings (recipe may be halved)

INGREDIENTS

2 ½ tsp tamarind concentrate/paste
3 tbsp hot water
3 tbsp fish sauce
2 tbsp lime juice (1 to 2 limes)
2 tbsp white or light brown sugar
3 extra large eggs
Salt and freshly ground black pepper to taste
8 oz pad thai noodles
Neutral oil or cooking spray
12 oz boneless skinless chicken breast, sliced thin
4 oz small cooked shrimp, defrosted if necessary and patted dry
2 cups bean sprouts, divided
1/3 cup peanuts, chopped
6 scallion tops, sliced, divided
½ cup (packed) cilantro, chopped, divided
Lime wedges for serving


INSTRUCTIONS

1. In a small bowl or glass liquid measuring cup, whisk together the tamarind concentrate and hot water. Add the fish sauce, lime juice and sugar. Whisk until combined and set aside. In a medium bowl, beat the eggs and season lightly with salt and pepper (fish sauce is high in salt, so season conservatively); set aside.

2. Meanwhile, bring a large pot of water to a boil. Add the noodles and cook until al dente, 3 to 4 minutes (or according to package directions). Drain in a colander and rinse thoroughly with cold water.

3. In a large sauté pan (see recipe head note), heat a thin layer of oil (or use cooking spray) on medium high heat. Add the chicken, season lightly with salt and pepper and cook, stirring frequently until cooked through, 4 to 5 minutes. Add the shrimp and stir until just heated through, about 1 minute. 

4. Reduce heat to medium and push the chicken and shrimp to the edges of the pan. Add about 2 tsp of oil or mist the center of the pan with cooking spray. Add the eggs. Cook until just beginning to set (reduce heat if eggs are cooking very quickly). Start breaking the eggs up with your spatula; you should still have some runny/liquid bits at this point. Add the noodles, 1 cup of the bean sprouts, half the peanuts, half the scallions, and half of the cilantro. Gently fold all the ingredients together until eggs are set.

5. Give the tamarind mixture another quick whisk and add to the pan. Stir until combined and most of the sauce is absorbed (sauce will continue to absorb as pad thai cools). Serve immediately and garnish with remaining bean sprouts, peanuts, scallions, cilantro and lime wedges.

This Thai Cantaloupe-Cucumber Salad with Shrimp (and a tangy Asian dressing) is part of my healthy AND low FODMAP Thai menu! Your main dish is tasty Pad Thai Noodles with chicken and shrimp. Click through to get both recipes!
These Pad Thai noodles with chicken and shrimp are part of my healthy AND low FODMAP Thai menu! Your side dish is Thai Cantaloupe-Cucumber Salad with Shrimp (and a tangy Asian dressing). Click through to get both recipes!

Thai Cantaloupe & Cucumber Salad with Shrimp

I bought a Thai basil plant this year and that's what I used, but regular basil or mint (or a combo) would be just as tasty.

Serves 5 (1 serving = about 1 cup)

INGREDIENTS

1 ½ c chopped English cucumber (192 grams)
1 ½ c matchstick-cut or grated carrots (168 grams)
1 ½ c chopped cantaloupe (250 grams)
1 cup bean sprouts (82 grams)
10 small cooked shrimp, defrosted if necessary and patted dry
3 tbsp lime juice (from 2 limes)
1 tbsp reduced sodium soy sauce
1 tbsp fish sauce
3 tbsp brown sugar
¼ cup (packed) fresh Thai basil, basil, or mint leaves, chopped

INSTRUCTIONS

1. In a large bowl, combine cucumber, carrots, cantaloupe, bean sprouts and shrimp. In a small bowl, whisk together lime juice, soy sauce, fish sauce and brown sugar.

2. Add sauce and chopped herbs to salad mixture and stir gently to combine. Best served right away; may be covered and refrigerated up to 1 day.

Maple-Marinated Salmon with Sesame-Spinach Rice

Maple-Marinated Salmon with Sesame-Spinach Rice

This maple-marinated salmon with spinach rice is a simple, healthy recipe that doesn't require too many ingredients for weeknight cooking. It's from The Low-FODMAP Cookbook by Dianne Fastenow Benjamin. Click through to get the recipe and read my rev…

Pin it!

This recipe comes from The Low-FODMAP Cookbook by Dianne Fastenow Benjamin. It's a healthy and tasty dish that gets a lot of flavor from just a few simple ingredients.

Read on to see what I think of the cookbook and get the recipe!

Easy Weeknight Salmon

I love that this salmon looks beautiful enough to serve to guests, but it's simple enough to make on a weeknight. The key to this magic is minimal ingredients that pack a lot of flavor. Specifically, maple syrup, soy sauce, and garlic-infused oil.

The marinade is so good, my only complaint is that I wanted more of it. I might make extra next time and reserve a bit to drizzle over the finished salmon.

All About the Cookbook

If you've ever searched for "FODMAP" on Pinterest, I'm 99.9% sure you've come across Dianne's recipes. She's been posting low-FODMAP meals on her blog Delicious As It Looks for years. I'm also biased to like whatever Dianne does because she's a pug lover like me!

But back to the cookbook. It's a great collection of approachable and tasty recipes. There aren't any hard-to-find ingredients or advanced techniques so it's great for beginner cooks. 

The recipes tend toward American home cooking and comforting flavors, for example:

  • Shrimp Pasta with Lemon and Kale
  • Grilled Marinated Pork Chops
  • Quinoa Pilaf with Carrots and Herbs
  • Cranberry-Orange Scones

The recipe sections are: basics, breakfasts, soups, salads and sides, soups, main dishes, and desserts. There's also a useful introductory section on navigating the FODMAP diet.

Some recipes that I bookmarked to try:

  • Quinoa Morning Glory Muffins
  • Roasted Green Beans with Prosciutto
  • German Potato Salad with Goat Cheese and Chives

I love seeing new FODMAP cookbooks on the market, and this is a great one if you love unfussy, American favorites. After spending the first part of 2016 writing The Calm Belly Kitchen Cookbook, I love sitting back and testing other people's recipes for change--and Dianne's look fabulous!

Maple-Marinated Salmon with Sesame-Spinach Rice

Adapted from The Low-FODMAP Cookbook
To make it weeknight-friendly, the recipe calls for instant rice. You could just as easily cook up a pot of rice the traditional way, or make it ahead of time. To garnish, I reserved a few sesame seeds and used fresh pea shoots...totally optional but cute!
Serves 4            

Ingredients

1/4 cup garlic-infused oil
1/4 cup pure maple syrup
2 tbsp gluten-free soy sauce or tamari (I used low-sodium)
1/4 tsp freshly ground black pepper
4 (4-oz) salmon fillets, skin removed
Cooking spray
1 3/4 cups water
1/2 to 3/4 tsp kosher salt (to your taste)
2 cups instant brown rice
4 cups baby spinach leaves
1 tbsp toasted sesame seeds
1 tbsp dark/toasted sesame oil
4 scallion tops, sliced

Instructions

1. In a medium bowl, whisk together the garlic oil, maple syrup, soy sauce and black pepper. Place salmon fillets in a large zip top bag and add garlic-maple mixture. Toss to coat and refrigerate for 2 to 4 hours.

2. Preheat oven to 400F. Line a large, rimmed baking sheet with foil and mist with cooking spray. Place salmon on baking sheet and drizzle a bit of the marinade over the top. Bake until salmon is opaque in thickest part and reaches 145F on an instant read thermometer, 12 to 18 minutes, depending on thickness.

3. Meanwhile, bring the water and salt to a boil in a large saucepan. Stir in rice and return to boiling. Reduce heat to low, cover, and simmer for 5 minutes. Remove from heat and rest, covered, 5 minutes more.

4. Mist a large nonstick skillet with cooking spray and heat to medium-high. Add spinach and cook until wilted. Reduce heat to low and add rice, sesame seeds and sesame oil (If your skillet is too small to fit all the rice, add the spinach to the saucepan with the rice instead). Toss gently to coat. Divide rice among 4 plates and top with salmon. Garnish with scallions and serve.

Disclosure: This post includes affiliate links. 

One-Pan Cheesy Mexican Rice (and Free Cookbook Preview!)

One-Pan Cheesy Mexican Rice (and Free Cookbook Preview!)


My One-Pan Cheesy Mexican Rice with Ground Beef is the ultimate one-dish meal! It's easy enough for weeknight dinners, and it's kid and family friendly, as well as low fodmap and gluten free. Click to get the recipe and a bonus sneak peek at the Cal…

Click to pin it!

Today's recipe is:

  • Easy (as in, "after-work easy")

  • Cheesy (easy and cheesy!)

  • Low-FODMAP (and gluten free)

  • Made completely in one pan

  • Crazy-good

This magical unicorn of a recipe is my One-Pan Cheesy Mexican Rice with Ground Beef. Not only is it a tasty, all-in-one, low-FODMAP meal, it's the first recipe I'm sharing from the Calm Belly Kitchen Cookbook.

It's also got a really great backstory.

I've been developing the recipes for this cookbook since January. I planned them out and put them on my calendar. Week after week, I'd churn out a few more: testing them, planning the photo shoots and props, writing the text.

(For the record, it's an ebook, but I couldn't resist that cool mock up!)

Some of my original recipe ideas didn't pan out like I expected, or they just didn't fit into the book as it took shape. Somewhere in March, I figured out that I had about 45 recipes, but I wanted to hit 50.

So I asked you guys! If you've been part of the Email Crew for awhile, you might remember that around the end of March I asked you to nominate recipes you'd like me to create for the book. 

The suggestions were priceless because I got tons of insight into what you're really craving. I picked my top 3 and left it up to a vote. One-Pan Cheesy Mexican Rice with Ground Beef was the clear winner. 

A few people in the community have already tried it out and posted about it on Facebook:

I'm so glad I decided to ask for input (and help with recipe testing!) from the Calm Belly Community. It's made this book so much better than it could have been if I'd just worked away in secret.

The full recipe for my Cheesy Mexican Rice is below for you to try out...

...Or just snap up your own copy of the Calm Belly Kitchen Cookbook right now!

One-Pan Cheesy Mexican Rice with Ground Beef

It's best to use “instant” or “minute” rice since it takes a bit longer to cook with this method. I like using brown rice, but instant white rice will also work and should cook faster (use 1 ½ cups water for instant white rice). Regular white rice also works, but you'll need more water and the cooking time will be about 40 minutes.

Serves 6

INGREDIENTS

Cooking spray
1 ¼ lb ground beef
2 tsp ancho chile powder, divided
2 tsp cumin, divided
Salt and freshly ground black pepper to taste
2 ½ cups instant brown rice (see note above)
15 oz can petite diced tomatoe
15 oz can tomato sauce
2 cups water
8.75 oz can sweet corn, drained
4.5 oz can chopped green chiles
5 scallion tops, sliced
1 packed cup (4 oz) grated colby jack or cheddar cheese
Chopped fresh cilantro for garnish

INSTRUCTIONS

1. Heat a large saute pan or skillet with a lid on medium-high heat. Coat with cooking spray and add beef, 1 tsp of the chile powder, and 1 tsp of the cumin; season with salt and pepper. Cook, crumbling the meat with your spoon, until no longer pink, 6 to 7 minutes. Transfer to a paper towel-lined plate to drain.

2. Add rice to the skillet and stir well to coat with the juices from the meat. Add tomatoes, tomato sauce and water. Cover and bring to a simmer; reduce heat to medium low. Cook, stirring occasionally, until rice is tender, 20 to 25 minutes (The directions on the rice box don't apply; it takes a bit longer to cook with this method.).

3. Stir in corn, green chiles, scallions, beef, and remaining 1 tsp each of chile powder and cumin. Taste for seasoning and add salt and pepper if needed. Sprinkle cheese all over the top. Cover the pan and reduce heat to low. Cook until cheese is melted, 3 to 5 minutes. Rest 5 minutes, sprinkle with cilantro and serve.

Slow Cooker Chicken & Wild Rice Soup (& Bonus 1-Week Low-FODMAP Menu!)

Slow Cooker Chicken & Wild Rice Soup (& Bonus 1-Week Low-FODMAP Menu!)

This hearty chicken and wild rice soup is a cinch to make in the slow cooker. Thanks to a healthy secret ingredient, it's extra creamy and satisfying. Click through to get this easy recipe and a free 1-week low-FODMAP menu. The menu shows you how to…

This slow cooker soup is so rich and creamy that it's more of a chowder than a soup. I've eaten it 3 times this week, and I'm sad to run out! I'm so in love with it that I put together a whole week's worth of low-FODMAP meals around it.

More on that in a second, but if you want to just grab the free 1-week dinner menu right now, click the button!

This soup is packed with moist, shredded chicken, veggies and wild rice. To keep the leeks from getting so soft that they melt away, I saute them in a little garlic oil and add them at the very end so they retain their texture and bright oniony flavor. 

But the thing that really sets this recipe apart is a very simple secret ingredien

To get that thick, creamy texture with zero dairy, I stir two egg yolks into the soup. Not only do they thicken, but they add an extra hit of satisfying protein and healthy fat that makes this a meal in a bowl (but don't let that stop you from having a nice green salad on the side!). They don't taste "eggy" either, just rich and delicious.

This hearty chicken and wild rice soup is a cinch to make in the slow cooker. Thanks to a healthy secret ingredient, it's extra creamy and satisfying. Click through to get this easy recipe and a free 1-week low-FODMAP menu. The menu shows you how to…

The soup recipe is below, but I also put it into a 1-week menu of low-FODMAP dinners for you to download!

So often, when websites offer free meal plans and menus, they just give you 7 totally different recipes as if you have an hour or two to spend cooking every night of the week (and unlimited money to spend on ingredients). I know you don't have that kind of time because you've told me. 

So this menu features four main dinner recipes  with instructions on how to repurpose the leftovers or ideas for different side dishes to jazz them up on day two.

To get the menu delivered straight to your inbox, just click the yellow button and let me know where to send it! 

You'll also be added to the Calm Belly Email Crew, which means every Friday you'll get even more tips, inspiration and bonuses that you won't find on the blog.

So what do you think of this recipe? Have you ever used egg yolks as a thickener before? I'm absolutely loving my slow cooker right now, so if you have a favorite recipe to share, leave a link in the comments!

If you liked this post, would you take a second to share it on Pinterest or Facebook? Thank you...I'm giving you a big computer hug right now!

Pin it!

Slow Cooker Chicken and Wild Rice Soup

Low-FODMAP, Gluten Free (if made with low-FODMAP, GF broth)

Although I say adding egg yolks is optional, it's a great technique that makes this soup extra special. Stirring them in at the end creates a rich, creamy texture without tasting “eggy.” Since veggies tend to get a little too soft in the slow cooker, I like adding the sautéed leeks at the very end so they retain their bite and pack more onion-like flavor. However, if you want to add them at the beginning, sautéed or not, the soup will still be fantastic. Herbes de Provence is a blend of dried herbs, usually thyme, rosemary, marjoram and lavender; find it in the spice section. Dried thyme may be substituted.

Author: Julie-Calm Belly Kitchen             Recipe type: Main dish
Prep time: 10 mins    Cook time: 4 to 8 hours, 30 mins    Total time: 4 to 8 hours, 40 mins
Serves 4 to 5 

INGREDIENTS
 
4 carrots, peeled and chopped
1 large zucchini, chopped
1 lb boneless, skinless chicken breasts, cut in half if large
1 tbsp butter
1/2 teaspoon dried herbes de Provence or dried thyme
1 bay leaf
4 cups chicken broth
1 cup water
3/4 cup wild rice-brown rice blend (I use Lundberg)
2 egg yolks (optional)
2 tsp garlic-infused or regular olive oil
1 small leek, green parts only, sliced
3 tbsp lemon juice (from 1 lemon)
Salt and black pepper to taste
Grated parmesan cheese for serving
Chopped fresh Italian parsley for serving

INSTRUCTIONS

1. Add all ingredients through rice to a large slow cooker and cook until chicken breasts are opaque in the thickest part (165F on an instant-read thermometer) and rice is tender, 4 hours on high, or 8 hours on low.  Transfer chicken breasts to a cutting board.

2. In a small bowl, whisk the egg yolks. Slowly pour about ¼ cup of the hot soup into the yolks as you whisk (this heats up the yolks so they don't start to scramble when you add them to the hot soup). With the slow cooker on high, slowly pour the yolk mixture into the soup, stirring as you pour. Cover the slow cooker and cook on high for 10 minutes.

3. Heat the garlic oil in a skillet on medium heat. Add leek, season with salt and pepper, and cook until tender, 6 to 8 minutes. Shred the chicken and add it back to the slow cooker along with the leeks. Cover and cook for a few minutes, just until chicken is heated through. If soup is very thick, add water or broth (I added about ½ cup) to thin as you like. Turn off slow cooker and stir in the lemon juice. Season to taste with salt and black pepper. Ladle into bowls and top with Parmesan and fresh parsley.

Sardine Spaghetti with Tomato-Caper Sauce (Gluten Free, Low-FODMAP, Dairy Free)

Sardine Spaghetti with Tomato-Caper Sauce (Gluten Free, Low-FODMAP, Dairy Free)

This Sardine Spaghetti is a simple pasta dish that's ridiculously healthy and packed with flavor. The quick tomato-caper sauce goes so well with the savory sardines. This dish is gluten free, dairy free and low-FODMAP, but you won't be missing out o…

This pasta dish is one of my favorites. I easily make it twice a month. It's definitely a “Go-To Meal” for me, but I haven't stopped and written up the recipe until now.

If you need a simple, seriously healthy meal to break up your holiday feasting, this is it! Sardines are considered a superfood, but I (and probably you, too) wouldn't be eating them if they weren't so tasty.

Sardines are little umami powerhouses—they have that addictive savory-salty-funky flavor that's considered the “fifth taste.”

 Sometimes eating clean or dealing with dietary restrictions means losing out on those special flavor boosters that take a recipe from “really good” to “crazy delicious.” Not the case here!

 If you need more convincing, the sardines make this meal ridiculously healthy. Just the highlights:

  • Bone-building vitamin D, which is hard to come by if you don't eat a lot of dairy or get a lot of sun

  • More iron than the same amount of steak so your immune system stays strong, and you don't get sick so often

  • Omega-3 fatty acids, which sharpen your memory (yup, this recipe will make you smarter)

Lastly, I'm dedicating this recipe to one of my favorite people on the internet as a little holiday gift. She's helped me make this website and all the content that goes with it something I'm truly proud of. I know she appreciates the magical deliciousness of sardines, so this is for you, Regina!

So, have I talked you into whipping up some sardine spaghetti, or are you already a fan of these tasty little fish? If you have a great recipe with sardines, please share in the comments!

This Sardine Spaghetti is a simple pasta dish that's ridiculously healthy and packed with flavor. The quick tomato-caper sauce goes so well with the savory sardines. This dish is gluten free, dairy free and low-FODMAP, but you won't be missing out o…

Sardine Spaghetti with Tomato-Caper Sauce (Gluten Free, Dairy Free, Low-FODMAP)

If gluten-free pasta hasn't won your heart (my favorite brands are Jovial and Trader Joe's), this dish is just as good with quinoa. The sauce (you can always double the recipe to have leftovers) is also great over roasted fish, with eggs and toasted bread for breakfast, or added to a rice bowl. I use Ian's panko-style GF breadcrumbs because they stay crispier than the traditional kind. My favorite brand for sardines is Crown Prince (I like the water-packed variety), which I buy at Whole Foods, because the bones and tails are already removed. You can also substitute tuna (the Italian-style packed in olive oil works especially well). If you're low-FODMAP, stick to 1/8 of an avocado per serving.

Author: Julie~Calm Belly Kitchen             Recipe type: Entree
Prep time: 5 mins        Cook time:  30 mins        Total time: 35 mins
Makes 3 low-FODMAP servings or 2 larger servings (can be doubled)


INGREDIENTS

2 tbsp extra-virgin olive oil or garlic-infused oil, divided
3 tbsp gluten free breadcrumbs
Salt and freshly ground black pepper
3 oz (about 3 big handfuls) spinach leaves
2 to 3 scallions, sliced (green parts only for low-FODMAP)
¼ tsp red chile flakes (or to taste)
1 (14.5 oz) can petite diced tomatoes (regular diced is good too)
1 tbsp drained capers, roughly chopped
6 oz gluten-free spaghetti
2 (4.37 oz) cans sardines, drained and de-boned if necessary
¼ to ½ avocado, chopped
Lemon wedges for serving


INSTRUCTIONS

1. Heat 2 tsp of the oil in a large skillet on medium. Add breadcrumbs and stir to coat with oil. Cook, stirring occasionally until lightly toasted, about 3 minutes. Season with salt and pepper to taste. Transfer to a small bowl and set aside.

2. In the same skillet, heat 1 tsp of the oil on medium heat. Add spinach and season with black pepper to taste. Cook, stirring frequently until wilted, about 2 minutes. Transfer to another bowl and set aside.

3. Add remaining 1 tbsp oil to the same skillet and heat on medium. Add scallions and chile flakes and cook until scallion is tender, about 1 minute. Add tomatoes with their juice. Raise heat to medium high and bring to a simmer. Cook, stirring occasionally, until sauce thickens slightly, 8 to 10 minutes. Stir in capers and remove from heat.

4. Meanwhile, bring a large pot of water to a boil on high heat. Season with salt and add spaghetti. Cook until al dente according to package directions and drain. Return pasta to the pot you just cooked it in. Add sardines, spinach and tomato sauce (for low-FODMAP, reserve about ¼ cup of the sauce for another use). Place pot over low heat and stir gently to combine. Cook just until heated through, 1 to 2 minutes. Top each serving with breadcrumbs and avocado and serve with lemon wedges.


Nutrition Information
Serving size: 1/3 of recipe  Calories:545  Fat:24 g Saturated fat:4 g Carbohydrates:63 g Sugar:4  g Sodium:457 mg Fiber:6 g Protein:21 g


Vegan Nut & Veggie Tart with Green Herb Sauce (Low-FODMAP, Gluten Free, Dairy Free)

Vegan Nut & Veggie Tart with Green Herb Sauce (Low-FODMAP, Gluten Free, Dairy Free)

If you are vegan or plan to cook for vegans or vegetarians, this meatless main dish is perfect for a crowd! It makes a beautiful holiday main course, and it can be made ahead of time. It's full of delicious winter vegetables, plus rice, lentils and …

Ah, holiday cooking. So many dietary needs to take care of. Enter the vegan tart. This recipe is for you if…

  • You're a vegan or vegetarian.

  • You're cooking for vegans or vegetarians sometime soon.

  • You want a crazy-nutritious meatless main dish for the holidays.

But let me backtrack for a second. This recipe came about through an informal collaboration with Alana, the very talented writer behind the blog, A Little Bit Yummy.

She had a lot of readers asking for a vegan nut loaf recipe to make for the holidays. However, being allergic to nuts, she asked if I'd be interested in developing the recipe.

My answer: Heck, yes!

Through the past 9 years of doing freelance recipe development, some of my favorite jobs have been the ones that are different from my personal eating style. Stretching that creative muscle is always a good idea: It's both fun and mentally engaging!

Let's get into the details...

Here's what the ingredients look like before stirring in the nuts and right before going in the oven. Everything stays super-moist, without any crumbling.

Here's why I think this is the vegan recipe you need to try this season:

It won't weigh you down. Some vegan nut loaves have the heft of a hockey puck and come in at 1,000 calories per serving (it happens!). Not this tart. Instead of mostly nuts, this recipe consists of brown rice, lentils and a bunch of winter veggies. It will make your kitchen smell like Thanksgiving.

The sauce. The sauce alone is a gem. With the creaminess of avocado and a tangy hit of lemon, you'll want to eat it straight. Double the recipe if you want; whip it up anytime you've got extra herbs on hand; put it on everything!

It's not a loaf, it's a tart! If you've never found the look of traditional vegan nut loaves all that enticing, this pretty tart is the answer.

No advanced cooking skills. There are quite a few steps to get all the components together, but they're easy-peasy. Plus, you can do some or all of it ahead if you want.

Freedom of choice. If you really want to make a loaf, this recipe should fit in 2 standard loaf pans. But there are other fun possibilities: Use a muffin tin to make individual servings for a potluck or buffet. Use mini muffin tins to make appetizers (cute!)--just be sure to decrease the baking time. I love baking in my cast iron skillet because it looks great at the table, but a pie plate or similar-sized baking dish will work too.

So are you convinced? I'd love to know how many of you follow a vegan or vegetarian diet. Do want to see more recipes like this? Will you give this one a try? Let me know below in the comments!

If you are vegan or plan to cook for vegans or vegetarians, this meatless main dish is perfect for a crowd! It makes a beautiful holiday main course, and it can be made ahead of time. It's full of delicious winter vegetables, plus rice, lentils and …

Vegan Nut and Veggie Tart with Green Herb Sauce (Low-FODMAP, Gluten Free, Dairy Free)

A cast iron skillet is great for baking this rustic tart, but any oven-safe 9-inch pan will work, as well as any similar-size baking dish, such as a pie plate. If you use a baking dish, I recommend greasing it with butter or ghee as noted in the recipe. The easiest way to shred the carrot and parsnip is with a food processor with a shredding disk. If you don't have this attachment, you can grate them on a box grater or cut into very thin strips (julienne) with a knife.

Author: Julie-Calm Belly Kitchen             Recipe type: Entrée
Prep time: 50 mins        Cook time: 25 mins        Total time: 1 hour, 15 mins
Makes 8 servings


INGREDIENTS

For Tart:
2 tbsp olive oil, divided
3/4 cup (84g) walnuts
3/4 cup (84g) pecans
1 medium carrot, peeled and shredded (about 1 cup/85 g shredded; see note above) 
1 medium parsnip, peeled and shredded (about 1 cup/85 g shredded; see note above) 
½ tsp dried rosemary
½ tsp dried thyme
Salt and freshly ground black pepper to taste
1 medium leek, green part only, chopped (about 1 cup)
1 rib celery, diced (about 2/3 cup)
¾ cup (105 g) cooked brown rice
2/3 cup (92g) rinsed and drained canned lentils
3 small slices (75g) low-FODMAP, gluten-free bread
1 cup unsweetened almond milk
1 tbsp chia seeds
Nonstick cooking spray, butter or ghee for greasing your pan (see note above)

For sauce:
1 cup (packed) mixed parsley and cilantro (leaves and thin stems)
¼ avocado, chopped
2 tbsp lemon juice (from 1 lemon)
1 tsp Dijon mustard
1 tsp hot sauce (optional)
3 tbsp extra virgin olive oil
¼ to ½ cup water
Salt and freshly ground black pepper to taste


INSTRUCTIONS

1. Preheat oven to 350F. Spread walnuts and pecans on a large, rimmed baking sheet and bake until fragrant and light golden brown, 7 to 8 minutes, stirring them around about halfway through. Transfer to a plate and set aside until completely cool (I like to do this a day or two ahead of time). When cool (otherwise they can turn into a paste), finely chop in a food processor fitted with the metal blade.

2. If the shredded carrots or parsnips are very long, roughly chop so pieces are no longer than 1 inch. Heat 1 tbsp of the oil in a large skillet (if you'll be baking the tart in a 9-inch oven-safe skillet, you can use that) on medium. Add the carrot, parsnip, rosemary, thyme, and salt and black pepper to taste. Cook, stirring frequently, until tender and lightly browned, 5 to 7 minutes. Transfer to a large bowl.

3. Add remaining 1 tbsp of the oil to the same skillet and heat on medium. Add leek, celery and salt and pepper to taste. Cook, stirring frequently, until tender and light golden brown, 6 to 8 minutes. Add to bowl with carrot mixture. Add the rice, lentils and chopped nuts and stir until combined.

4. Place the bread in a shallow bowl or small baking dish in a single layer. Add the almond milk and allow the bread to soak until very soft but not dissolving, about 5 minutes, turning once. Tear into small ½-inch pieces and add to bowl with veggie mixture (discard remaining almond milk). Stir until combined.

5. In a small bowl, stir together the chia seeds and 3 tbsp warm water. Set aside until mixture thickens to a gel-like consistency, about 5 minutes. Add to bowl with veggie mixture and stir until combined. Taste for seasoning and add extra salt, pepper or herbs (or other spices) as desired. Coat a 9-inch oven-safe skillet (such as cast iron or stainless steel) with nonstick cooking spray; or coat a 9-inch pie plate or similar-size baking dish with butter or ghee. Add veggie mixture and pat into an even layer. Bake at 350F until slightly puffed in the center and lightly browned at the edges, 25 to 30 minutes. 

6. Make the sauce: In a food processor fitted with the metal blade, combine herbs, avocado, lemon juice, mustard and hot sauce if using. Pulse until herbs are chopped, scraping down the bowl as needed. With processor running, slowly pour the olive oil in through the feed tube, followed by ¼ cup of the water. Scrape down the sides of the bowl. Add more water as needed until the sauce is thick but pourable (you should be able to drizzle it off a spoon). Season to taste with salt and pepper.

7. When tart is done baking, cool for 10 to 15 minutes. Cut into slices and drizzle with the sauce to serve. Tart may be made up to 2 days ahead. Cover and refrigerate. To reheat, cover with foil and bake at 275F until heated through, about 20 minutes; or transfer to a microwave-safe plate and microwave on medium power for about 2 minutes or until center is hot. For the most vibrant color, it's best to make the sauce just before serving.


Nutrition Information
Serving size: 1/8 of recipe (including sauce)  Calories: 360  Fat: 26 g Saturated fat: 3 g Carbohydrates: 29 g Sugar: 3  g Sodium: 108 mg Fiber: 6 g Protein: 8 g

Greek Rice Casserole with Ground Turkey (Low-FODMAP, Gluten Free)

Greek Rice Casserole with Ground Turkey (Low-FODMAP, Gluten Free)

This tasty and hearty low-fodmap casserole uses lean ground turkey. It comes together fast, so it's definitely a contender for weeknight meals. I use quick-cooking basmati rice, but any kind of rice would be great. The feta, olives and creamy sauce …

Does the word "casserole" make you think of 1950s housewives or high-fat fare made with tubs of sour cream? If so, it's time to meet the modern casserole!

This rice bake with Greek flair is an excellent example. It's healthy and light, but there's a ton of flavor thanks to kalamata olives and feta.

It's a low-FODMAP meal that comes together fast enough for weeknights. I also think it makes great leftovers, so don't hesitate to pack it up for lunch. 

I know I said this casserole is healthy (it's true!), but it also has a creamy sauce that pulls all the flavors together. 

This is actually pretty cool: It turns out you can make a very respectable bechamel sauce (the classic French white sauce) with a gluten-free blend and lactose-free milk. Very good news if you love creamy baked pastas and casserole like I do.

 And if you've never made bechamel sauce before, you're about to have some fun. It's easy. You'll be slightly anxious the first time, but after you've done it twice, you'll feel like a rockstar in the kitchen. I used butter in the sauce which is traditional, but I'm 99% sure olive oil or ghee would work too.

What do you think...Is this casserole your cup of tea? If you have a favorite casserole-type recipe, tell me about it in the comments!

This tasty and hearty low-fodmap casserole uses lean ground turkey. It comes together fast, so it's definitely a contender for weeknight meals. I use quick-cooking basmati rice, but any kind of rice would be great. The feta, olives and creamy sauce …

Greek Rice Casserole with Ground Turkey (Low-FODMAP, Gluten Free)

Feel free to substitute ground lamb or beef instead of the turkey. I recommend lactose free milk, which isn’t as watery as plant-based products, such as almond milk. I used basmati rice here because I like the delicate texture, but any kind of rice will work, cooked as directed.

Author: Julie-Calm Belly Kitchen             Recipe type: Entree
Prep time: 30 to 35 mins        Cook time: 20 mins        Total time: 50 to 55 mins plus resting
Serves 6 

INGREDIENTS

For rice: 
1 3/4 cup water
1 cup basmati rice
1/2 tsp salt

For casserole:
1 tbsp garlic-infused oil or olive oil
1 lb ground turkey
1 tsp dried oregano, divided
3/4 tsp allspice, divided
1/2 tsp salt, divided
1/4 tsp red chile flakes (optional)
Black pepper to taste
2 tbsp unsalted butter
2 tbsp plus 2 tsp gluten-free flour blend
2 cups lactose-free milk (see note above)
5 oz baby spinach leaves, roughly chopped
14.5 oz can diced tomatoes, drained
1/2 cup pitted kalamata olives, chopped
Zest of 1 lemon
4 oz feta cheese, chopped
Chopped Italian parsley for garnish
Optional for serving: lemon wedges and low-FODMAP hot sauce


INSTRUCTIONS

1. Preheat oven to 375F. Bring the water to a boil in a medium saucepan. Stir in the rice and 1/2 tsp of the salt. When water returns to a boil, reduce heat to lowest setting, cover and simmer for 15 minutes or until just tender (if not using basmati rice, cook according to package directions). Remove from heat, keep covered and rest for 10 minutes.

2. Heat a large skillet on medium to medium-high heat. Add garlic oil and heat just until oil is shimmering (don't let it smoke). Add turkey and cook, crumbling with a spatula, until no longer pink, 6 to 7 minutes. During the last minute or two, stir in 1/2 tsp of the oregano, 1/4 tsp of the allspice, 1/4 tsp of the salt, red chile flakes if using, and black pepper to taste. Set aside.

3. In a large saucepan, melt the butter on medium heat. Add the flour and stir until fully moistened, about 1 minute. Slowly add about 1/2 cup of the milk as you stir. When it starts to simmer, add another 1/2 cup while stirring and scraping any bits of flour from the edges of the pan. Switch to a whisk and slowly add the rest of the milk in 2 additions as you whisk, letting it come to a simmer each time. Continue to whisk and simmer until mixture is slightly thickened, 2 to 3 minutes. Use the whisk to break up as many clumps of flour as you can, but some small clumps will remain, and that's okay. 

4. Reduce heat to lowest setting. Add the spinach leaves, remaining 1/2 tsp oregano, 1/2 tsp allspice, 1/4 tsp salt and black pepper to taste. Stir until spinach is just wilted, about 2 minutes. Add tomatoes, olives, lemon zest and ground turkey and stir until just heated through, 1 to 2 minutes. Stir in the rice.

5. Transfer to an approximately 2 1/2-quart baking dish (11 x 7" or large round dish will work). Sprinkle feta on top. Bake in the center of the oven at 375F until liquid is bubbling around the edges and cheese is starting to turn golden brown, 20 to 24 minutes. Rest 10 minutes, sprinkle with parsley and serve with lemon wedges and/or hot sauce if using.

Nutrition Information
Serving size: 1/6 of recipe  Calories: 445 Fat:19 g Saturated fat: 8g Carbohydrates: 37g Sugar: 7g Sodium: 975mg Fiber: 2g Protein: 31g

Brown Rice Noodle and Veggie Stir Fry with Shrimp (Low-FODMAP, gluten free)

Brown Rice Noodle and Veggie Stir Fry with Shrimp (Low-FODMAP, gluten free, dairy free)

This low-FODMAP, gluten free stir fry is easy and healthy! It's made with brown rice noodles for extra fiber. You can use any veggies and protein you want. It's a quick weeknight meal and tastes great for lunch the next day. Click through for the re…

Save it on Pinterest!

If giving up traditional wheat pasta still bums you out, this recipe will having you loving life again.

Plus, it's fast, addictive and makes for a great leftover lunch.

This is all because of the star ingredient, Asian rice noodles. They're gluten-free of course, they cook in 3 minutes, and they don't take on a weird, gummy texture the next day-- which means you can easily reheat or eat 'em cold straight from the fridge.

Asian rice noodles are versatile (just try them with extra-virgin olive oil, parmesan and lemon zest), but I absolutely love them in this simple stir fry.

How to make this easy rice noodle stir fry!

Here's how it works: You make a quick, tasty sauce and sauté (or steam, or microwave) some veggies. Meanwhile you boil a big pot of water and cook the noodles.

Then you get your protein ready. In this case, I made sautéed shrimp, but you could use baked salmon or chicken, smoked fish, stir fried pork or tempeh, ground turkey or chicken--pretty much anything.

Finally you add it all back to the pot you cooked the noodles in and toss it up. Done. 

All about Asian rice noodles

For this recipe, I used brown rice vermicelli from Annie Chun. You can use any brand. If you have access to an Asian market, you can get them fairly cheaply, but they might only have the white rice variety, not brown.

I like using brown rice noodles because they have 4 grams of fiber per serving (read more about how I like to build my meals around fiber-rich foods). But go with what works for you! I find the Annie Chun brand at large supermarkets, Whole Foods and Vitacost.com.

Asian rice noodles can't flat-out replace Italian pasta (my favorite gluten-free brand of Italian pasta is Jovial, by the way), but they definitely make some tasty meals. I love making pad thai with the thicker type of rice noodles. Have you ever had a low-FODMAP version? Let me know if you'd like a pad thai recipe, and I can make that happen!

If you liked this post, enter your info below to get a free 1-week menu of Low-FODMAP, gluten-free suppers delivered straight to your inbox!

This low-FODMAP, gluten free stir fry is easy and healthy! It's made with brown rice noodles for extra fiber. You can use any veggies and protein you want. It's a quick weeknight meal and tastes great for lunch the next day. Click through for the re…

Brown Rice Noodle & Veggie Stir Fry with Shrimp (Low-FODMAP, gluten free, dairy free)

You can use any veggies you want (or any protein--precooked chicken, pork or tempeh makes the cooking even faster). Some good options are zucchini, tomatoes, kale, broccoli, water chestnuts, bokchoy and eggplant. I also like sprinkling sesame seeds on as a garnish, but I forgot to do it for the photo shoot! A little hot sauce is nice too, if you like some heat.

Author: Julie-Calm Belly Kitchen             Recipe type: Entree
Prep time: 5 mins        Cook time: 30 mins        Total time: 35 mins
Serves 4 (makes great leftovers!)

INGREDIENTS

5 tbsp reduced sodium soy sauce (gluten free if needed)
3 tbsp light brown sugar or maple syrup
3 tbsp fresh lime juice (1 to 2 limes)
2 tbsp rice vinegar
2 tsp sesame oil
1 tbsp vegetable oil
1 large red bell pepper, sliced into thin 3-inch strips
2 cups matchstick carrots
1 tbsp chopped fresh ginger (1-inch piece)
Cooking spray (or additional vegetable oil)
5 oz spinach leaves
1 1/4 lb medium shrimp, peeled and deveined (frozen, defrosted work well)
1/4 tsp salt, plus additional to taste
Black pepper to taste
8 oz brown rice vermicelli
6 scallions, green parts only, sliced

INSTRUCTIONS

1. In a medium bowl, whisk together the soy sauce, brown sugar or maple syrup, lime juice, rice vinegar and sesame oil. Set aside. Heat the vegetable oil in a large skillet on medium-high heat. Add bell peppers and cook, stirring frequently for about 4 minutes. Add carrots and continue cooking until vegetables are crisp-tender, about 4 minutes more (add a few tablespoons of water to the skillet if vegetables start to stick). Add ginger and about three-quarters of the scallions and cook for 1 minute, stirring frequently. Transfer to a medium bowl.

2. Return skillet to the stove top, mist with cooking spray (or add more vegetable oil) and heat on medium. Add spinach and cook, stirring frequntly, until wilted, 2 to 3 minutes. Add to bowl with carrot mixture.

3. Return the skillet to the stove top one more time and mist with cooking spray (or add more vegetable oil). Heat on medium-high. Add shrimp, 1/4 tsp salt and black pepper to taste. Cook, turning occasionally, until shrimp are firm to the touch and opaque in the thickest part, 4 to 6 minutes.

4. Meanwhile, bring a large pot of water to a boil. Add rice noodles and cook, stirring frequently, until al dente, about 3 minutes. Drain in a fine mesh strainer and rinse with cold water. Return noodles to the pot you cooked them in. Give the soy sauce mixture a quick whisk and add to the noodles. Heat on medium high and bring to a simmer. Reduce heat to medium and add the vegetable mixture. Gently toss until combined and heated through. Stir in the shrimp. Taste and season with additional salt and pepper if needed. Serve right away and garnish with the remaining scallions.

Nutrition Information
Serving size: 1/4 of recipe Calories: 492 Fat: 9g Saturated fat: 2g Carbohydrates: 68g Sugar:  14g Sodium: 1302mg Fiber: 9g Protein: 38g